Support

WordPress: Best Practices For Editing Pages And Posts (Elementor)

How to use headings and subheadings #

  • From the WordPress dashboard, click the Pages tab or Posts tab.
  • Create a new page or edit an existing page where you want to add headings and subheadings.
  • To edit an existing page, hover over the page name or posts name.
  • Select ‘Edit with Elementor’.
  • In the Elementor editor, search for the ‘Heading’ widget in the left panel.
  • Drag and drop the Heading’ widget onto the desired section of your page.
  • Customize the settings of the Heading widget according to your needs. You can set the text, font style, size, color, alignment, and other formatting options.
  • If you want to add a subheading, you can use a Heading widget.
  • Then, choose the HTML Tag that you want such as H2, H3, H4, H5 and H6.
  • Customize the subheading’s appearance by adjusting its font style, size, color, and alignment.
  • Save the changes in Elementor by clicking on the Update’ button.
  • Preview or publish the page or post to see the headings and subheadings in action.

How to optimize images for the web #

Resize images #

The way to optimize images is to resize their pixel dimensions. Fortunately, this feature is built into the WordPress core. 

By default, WordPress uses four different sizes of the same image:

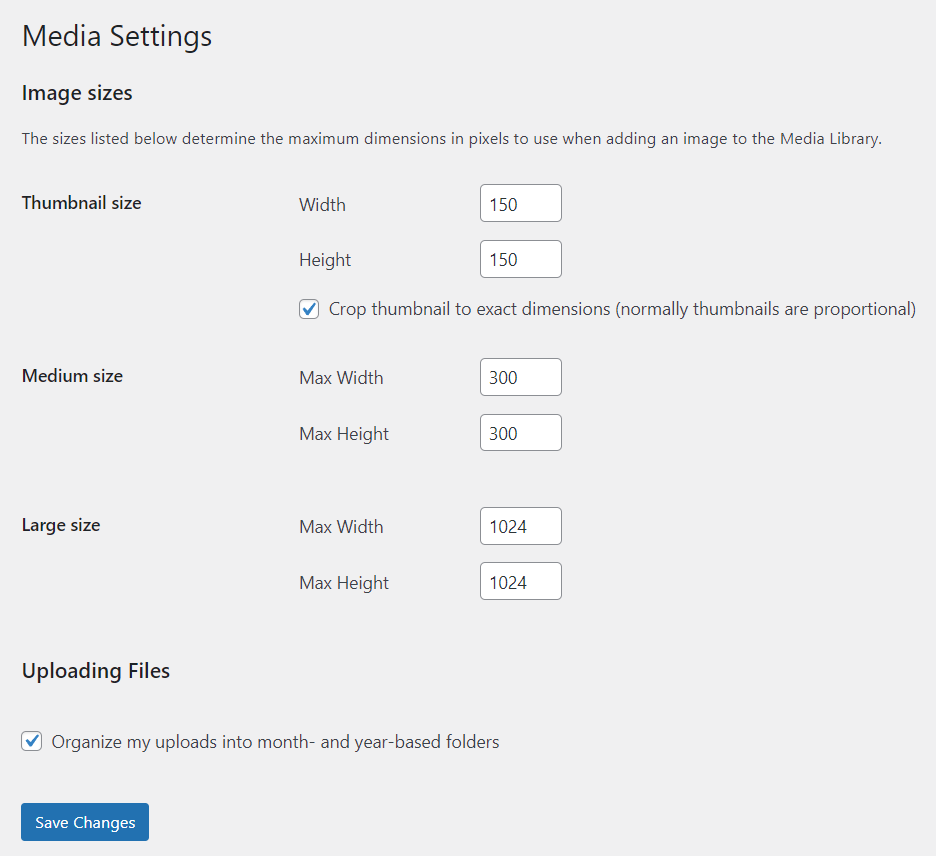
  • Thumbnail (150 x 150 pixels)
  • Medium (up to 300 x 300 pixels)
  • Large (up to 1024 x 1024 pixels)
  • Full Size (the original image size)

That being said, you can change them to fit your preferences. Here’s how to change the default WordPress image sizes via the media library:

  1. Open the WordPress dashboard and go to Settings > Media.
  2. Enter your preferred maximum width and height for each size.
  3. Click Save Changes.

How to use internal linking #

  • Drag and drop the Text Editor widget onto the desired section of your page or post.
  • Enter the text or content that you want to turn into an internal link.
  • Select the text or content that you want to turn into a link.
  • In the Text Editor toolbar, click on the link icon (looks like a chain link).
  • Enter the link that you want to put.
  • It could be a post, page, custom post type, or any other dynamic content on your website.
  • Then click the icon ‘arrow’ to apply.
  • You can also edit the internal link by clicking the Setting button beside the icon ‘arrow’.
  • Next, save the changes in Elementor by clicking on the ‘Update’ button.
  • Preview or publish the page or post to see the internal link in action.
What are your feelings