How to change the title #
To edit a post that already exists on your site:
- Go to Posts > All Posts in your WordPress dashboard.
- Click on the title of the post you want to edit in the list provided. If your list spans several pages, you can click through each page or enter your post’s title in the search box.
If you’re changing the title, slug, publish date or category of the post, you can do a Quick Edit and make this change directly from the All Posts page. To do this:
- Hover over your post title and a new menu will appear directly below the title.
- Click ‘Quick Edit’ from this menu.
- Make the changes that you want to effect and then click the ‘Update’ button.


How to change the content (Elementor only) #
1. Hover over your post title and a new menu will appear directly below the title.

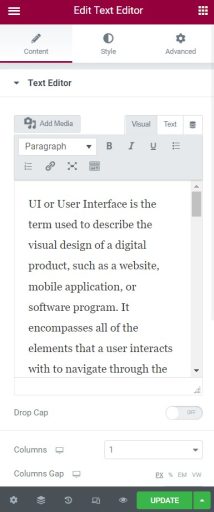
2. Click ‘Edit with Elementor’. The interface will change to another interface like this:

3. Click the icon ‘pen’ to change your content.
4. Your can change or update the text here.

How to change the featured image #
- Click your post’s title (post that you want to change the featured image).
- The right sidebar should appear in the block editor. If not, click the Settings button on the top-right corner of the editor.
- In the post, scroll down to find the part for the featured image.
- Click the ‘Replace Image’ button.
- Upload your image file or choose the image from Media Library that you want to change.
- Click ‘Set featured image’ on the bottom right corner.
- The featured image is now set!


How to add tags in the posts #
- In the WordPress dashboard, navigate to ‘Posts’ and click on ‘Tags’.
- Fill in the tag name that you want to put, slug and description.
- Click ‘Add New Tag’ button at the left bottom.
- A new tag has been inserted!


How to add categories in the posts #
- In the WordPress dashboard, navigate to ‘Posts’ and click on ‘Categories’.
- Fill in the name for your new category, slug and description.
- Click ‘Add New Category’ button at the left bottom.
- A new category has been inserted!


